Wednesday, December 26. 2012Steam Department Update 12-22-2012With Christmas close it was a small but active team at the steam shop this weekend. The next major milestone on 1630 was achieved as planned.
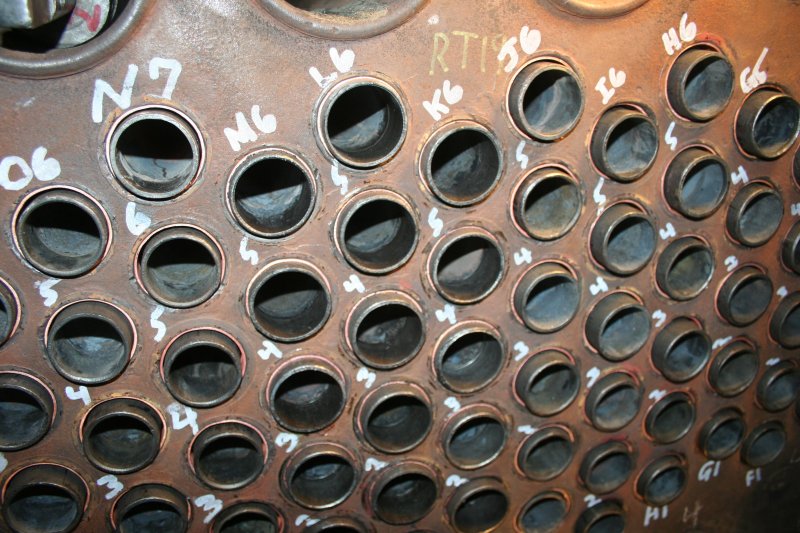
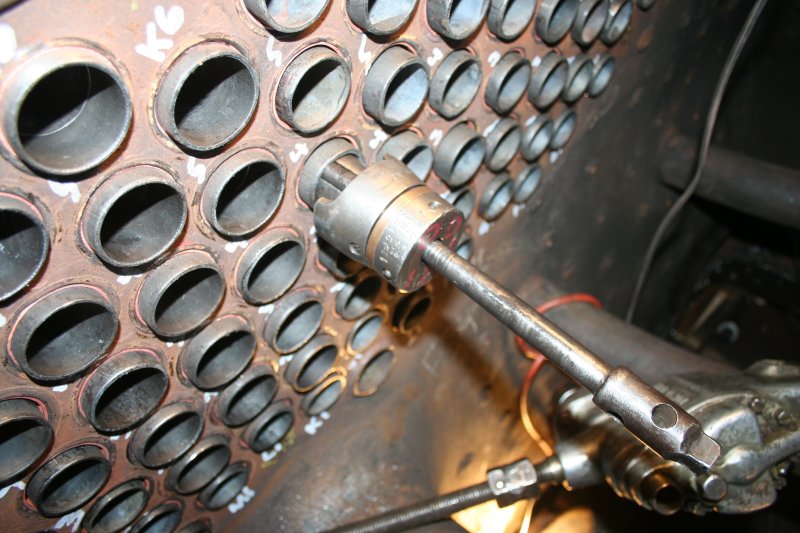
The last 17 fire tubes were loaded so all except for the 9 that will be installed along with the super heater flues are now in place. Then we moved on to rolling the fire box ends. As with each step, this was initially slow. It is critical that we fully understand the technique and can do it right each time before we start to do it on a large scale. However we made a good start, got more confident as the day progressed, and by end of day the first 15 were rolled. Looking closely at the view below you can see the effect. Comparing columns K, L and M to the adjacent columns, these are now tight in the tube sheet and set at a consistent 1/4 inch projection beyond the sheet.
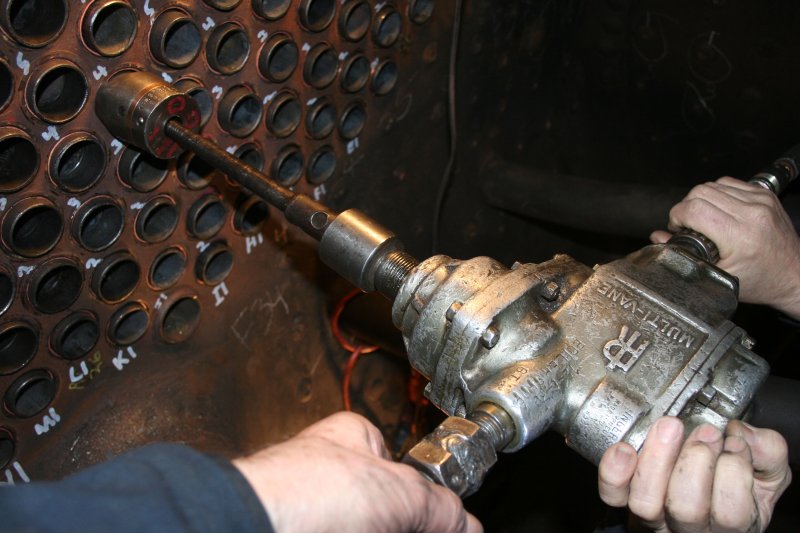
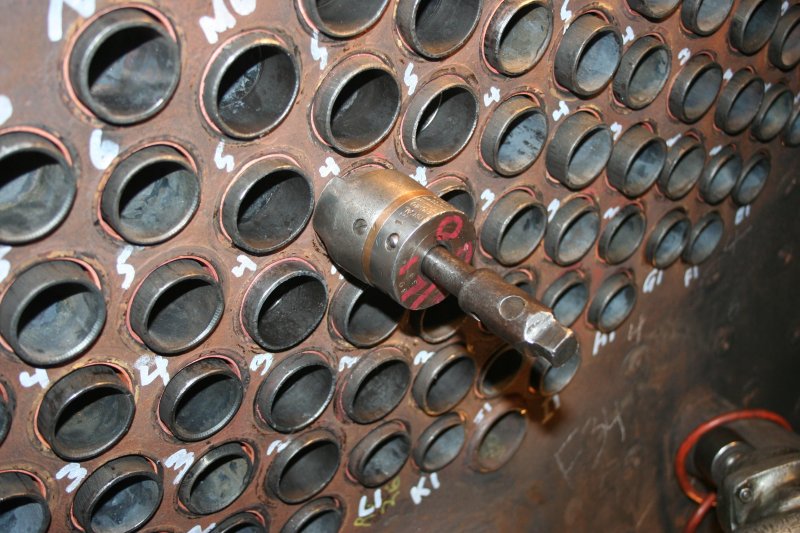
Once we have proved that everything is watertight the projection will be beaded over. All tube ends in the fire box are beaded to protect the joint from the direct effects of the fire. The rolling requires a team of three and is achieved by first setting the tube accurately with a 1/4 inch extension beyond the tube sheet. The team member in the smoke box then clamps that end of the tube to prevent movement. The roller is then inserted into the tube. Here you can see the construction of the roller. Three small hardened rollers are turned by the rotation of the tapered pin that is inserted thru the center.
The air motor is attached and rotates the central tapered pin.
The rotating pin is slowly drawn into the roller forcing the three hardened rollers out into the wall of the tube slowly increasing its diameter. When the tube is fully expanded against the ferrule and tube sheet the taper pin has been largely drawn into the roller.
The motor is then reversed to free the pin and the process continues with the next tube. In addition to the work on the fire tubes: · annealing was completed on the 16 super heater flues, so these are now ready to load once the fire tubes are secured; · drilling continued on the fire box patch. The holes are now complete on the front face. Once holes are made in the side face it will be finally formed to the mud ring along its whole length. We also took advantage of reasonable, if cold, weather to jack the end of the KCS tender to remove the wood packing that was left between the rubbing plates when it was delivered. This should now be in a condition which will allow it to be shunted so that the box cars of parts can be relocated back by the road to allow access. Nigel Wednesday, December 26. 2012Ely ceiling repair continues in DecemberLeading the repair and restoration on the Ely's observation end ceiling is Buzz Morisette. Here are a few more pictures of the progress in the repair. Please notice the one new roof support installed by Buzz on Wednesday December 5, 2012. 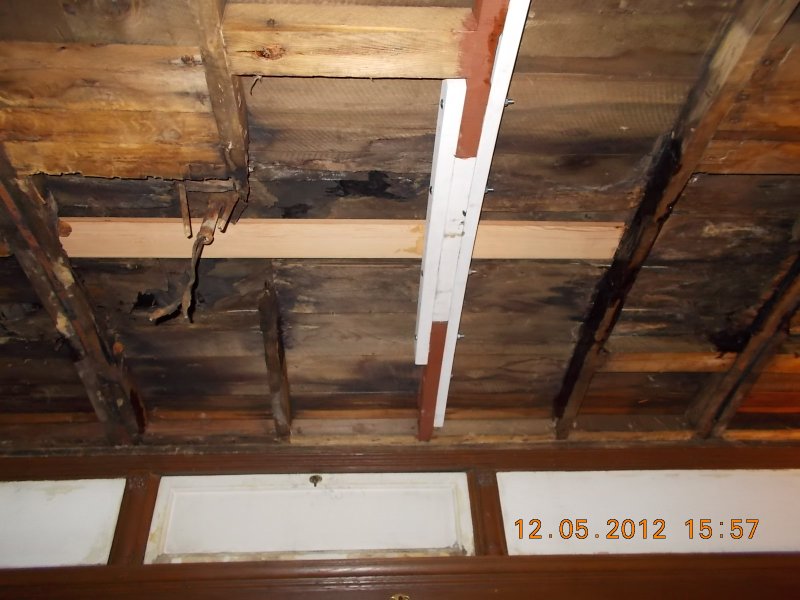 First installed piece Notice the bad condition of ceiling/roof 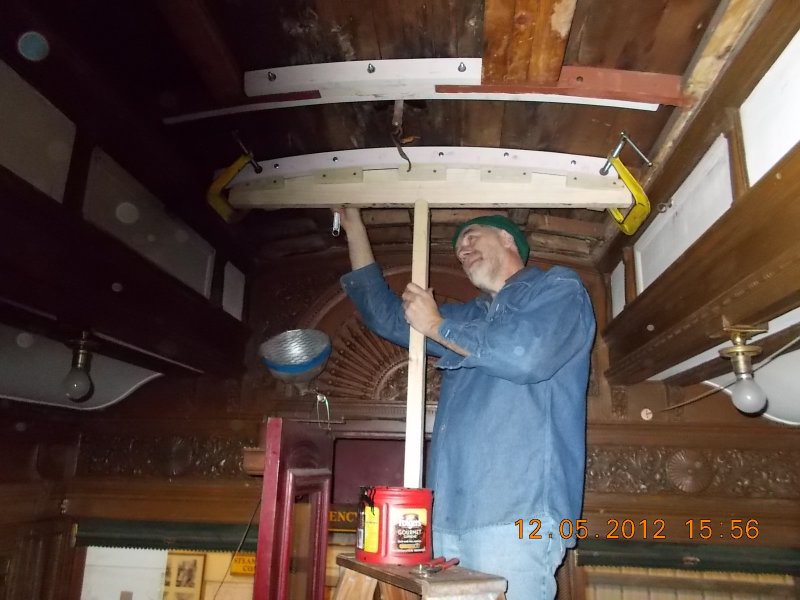 Buzz installing second ceiling reinforcement w/ jig Week of 12-5-12 Now in two weeks time look at the changes and the efforts that went into improving the ceiling wood supports. These photos were taken 12-19-12. Please compare the progress in those two weeks. Remember it has been relatively mild for this time of year. Buzz has made the most of the "good" weather.  You can see the progress w/ many new roof supports installed  So.. thats how you do it..  Its cold but Buzz continues to work on his plan  More boards installed... Looking Good Buzz With the Holiday's falling on a week day, the progress has been slowed. January will again bring Buzz and friends back to the project. Another PROJECT.... is the Barn 14 fund raising. Do not forget to send your donation in before January 2, 2013 to qualify for that tax deduction on your 2012 tax return. The CNW bilevels, CGW X38 snow plow, B&M 3288 wood diner, CB&Q 3007 Hudson and CA&E 319 interurban will all Thank You for your support. Roger Friday, December 21. 2012New efforts for CRI&P 2524Significant efforts to place back in service Rock Island 2524 have taken place in that last 2 weeks. I along with a new member Paul Cronin, have reinstalled the missing carrier iron, secured the steam line and installed piping and an angle cock missing on the trainline. That just on one end! Paul and I have also found the missing bent brake rod that connects the brakeshoes on the truck to the brake cylinder. Upon repair that too will be installed! As previously mentioned by Bob Kutella, Paul has much experience working on rr equipment. Before retirement he was Road Formen of Engines on part of the Boston and Maine RR. Here then, are two Wednesdays worth of progress preformed by just 2 people.  Rebuilt carrier iron before installation parts from two made into one  cutting out old rusty bolts  Gerry using the torch  Paul admiring the results  Steam line installed Next,the bolts must be tightened  Angle cock and pipe to be reconnected  Angle cock now installed Our ultimate goal would be to place back in service this car for 2013, our 60th anniversary. Who knows with all the special events and guests we might need another 100 seat coach in the train. Maybe.....we even could make more $ with another coach. We will see.... Would any of the Wednesday weekday crew like to help on the interior!! Its quite warm when the sun is out even in winter.  Project almost complete fabricating airline bracket next on the list Again.....donations are still greatly needed for the funding of Barn 14 building project. Roger |
Blog AdministrationCalendarQuicksearchArchivesSyndicate This Blog |

Comments
Fri, 03-29-2024 21:26
We're slackers and spend more time working on the equipment in the shop than keeping all you readers updated. We'll work on it, but I'm sure updates [...]
Thu, 03-14-2024 08:02
What happened to the Department Blog? It's been over 2 years and I still regularly check for updates, but nothing comes...
Mon, 12-27-2021 16:28
Happy New Year to all the Departments at the Illinois railway Museum! Thanks for all the good work you do in railroad preservation. Ted Miles, [...]
Wed, 10-13-2021 13:33
Was the CB&Q 1309 every transported to IRM?I’ve been reading old issues of Rail&Wire and the car was mentioned several times.
Mon, 06-07-2021 22:40
I was wondering if in the model layout display what scale would you guys be using and would you be displaying model train history as well? Just [...]
Wed, 06-02-2021 17:27
Nice to see 428's cab back on. Looking forward to when it is operable!
Tue, 06-01-2021 16:47
I hope the work will continue on the UP #428. Now that they are the museum's connection to the national railroad network; she would be very [...]
Sat, 04-17-2021 23:07
What is the status of 126, the Milwaukee Buffet car that is in S. Dakota? Any guess on when or if it will get to IRM?
Wed, 04-14-2021 21:09
Perhaps it is time to scrap the remains of the c, B & Q 7128 to make room for the Villa Real. Ted miles, IRM member
Wed, 04-14-2021 15:26
Hi IRM my name is Jason and I was wonder If you guys would be willing to save a CN Dash8-40cm they are currently being retired by CN and being [...]
Fri, 04-09-2021 19:56
Bear in mind that the Nebraska Zephyr is an articulated train set, so cars cannot be inserted at will. Although cars and/or a second engine could be [...]
Wed, 03-31-2021 11:37
I believe Silver Pony is currently on the back burner, and has been put into storage in one of the barns. The car needs a lot of work done to it's [...]