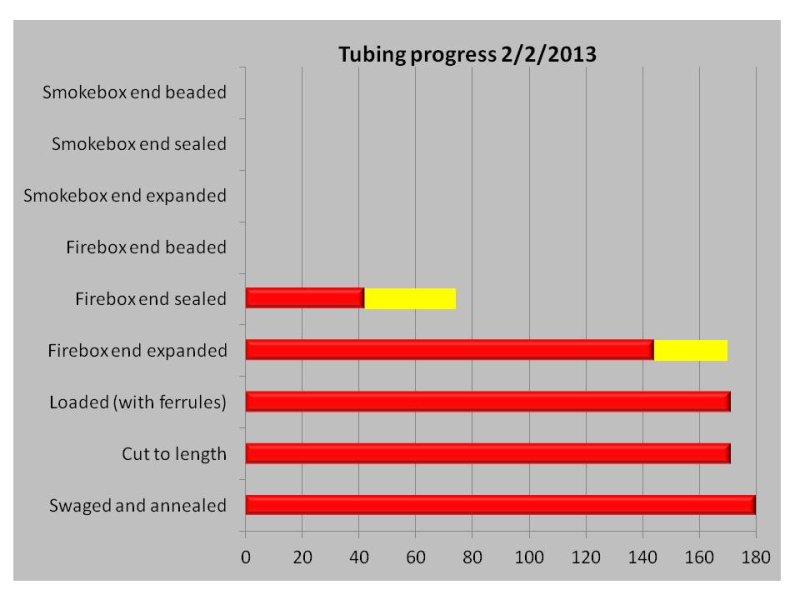
Sunday, February 3. 2013Steam Department Update 02-02-2013(With a couple of corrections 2/4/2013. Thanks to Bob for spotting that one of the links was wrong !!) The snow resulted in a limited turn out at the steam shop this weekend but a small and determined group kept things moving forward. On 1630 I worked with Phil, Dave and Cameron to continue the tube fitting:
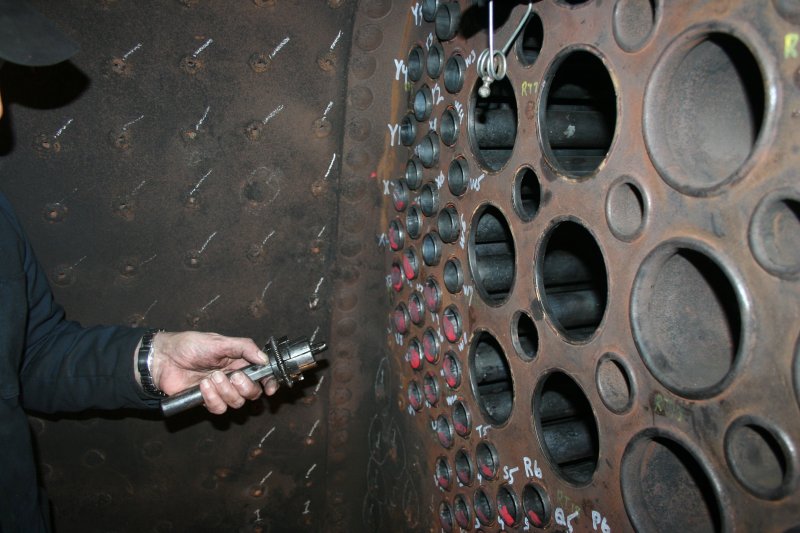
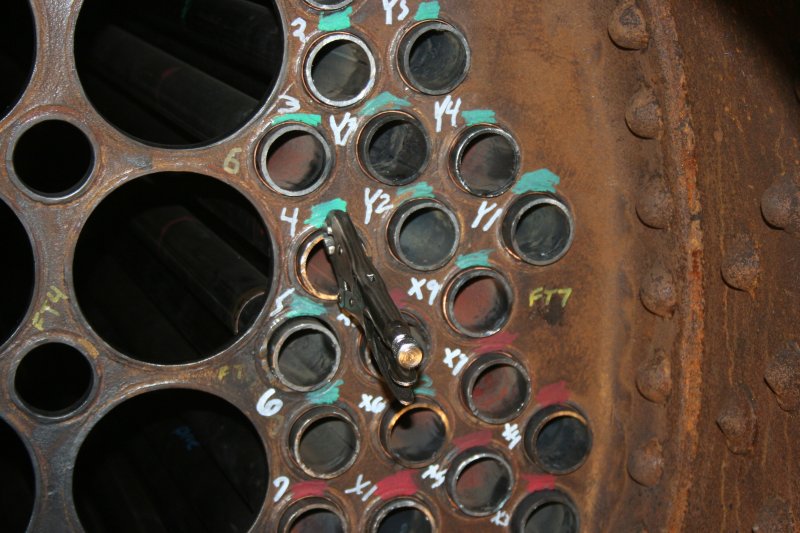
· All the remaining ends were fully expanded on the fireman's side. · We also removed one remaining tube where the ferrule had slipped, replaced it, and fully expanded the firebox end. · This leaves a number of tubes in the center, below the super heater flue holes that were set but not fully expanded. Unfortunately, while expanding these, one moved forward removing the ferrule from the back sheet. It will have to be replaced and, having been substantially expanded, proved a bear to remove. By end of day we have largely cut the end off to enable removal and should complete that next weekend. For the first time we were able to get clear pictures of the tube expansion process so can now show rather more clearly what we have been doing for the last few weeks.
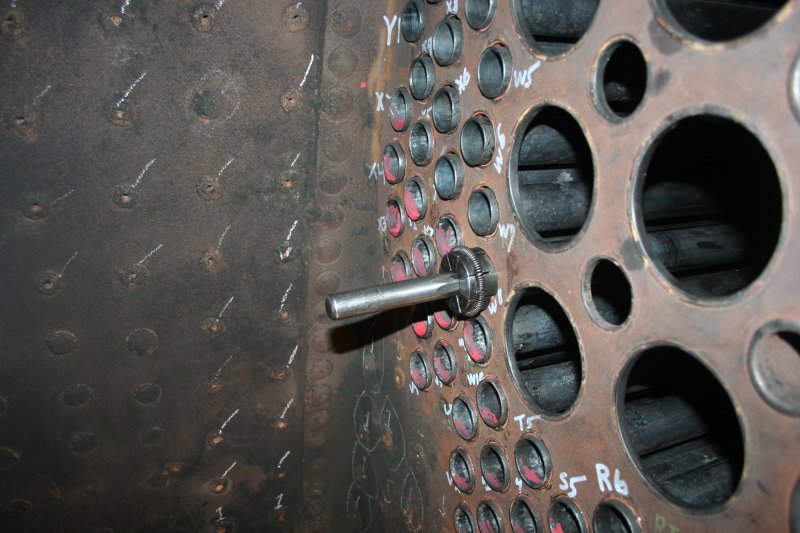
This is the expansion tool. The central steel pin is octagonal and drives the segments outward as it is driven between them. Several tools of this general type are used in the overall tube fitting process but this one is unique in having projecting "feet" on alternating segments. When in use, these bear against the tube sheet. This means that, as the tool is hammered, outward force is applied to the walls of the tube but the substantial forward force is not applied to the tube, but born by the tube sheet thru these feet.
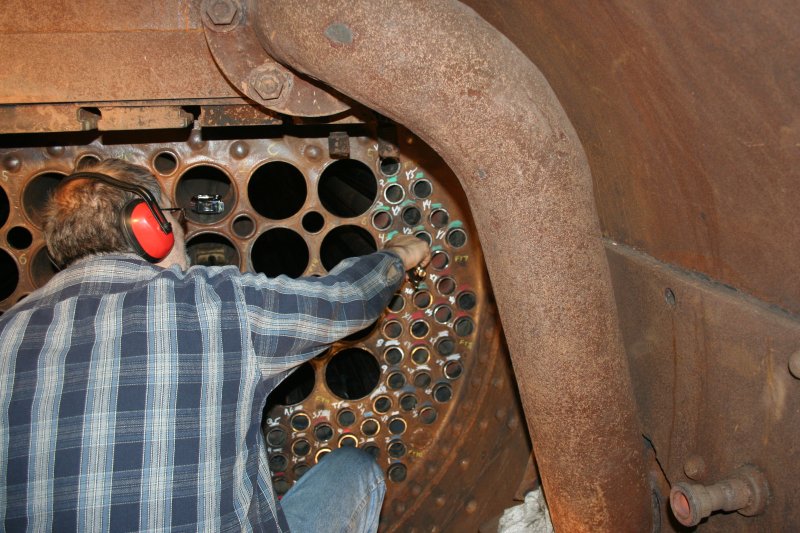
There is a careful process of adjusting the projection of the tube to 1/4 inch minimum thru the rear sheet then, before anything else, the tube is locked at the front. Here Dave is applying the clamp.
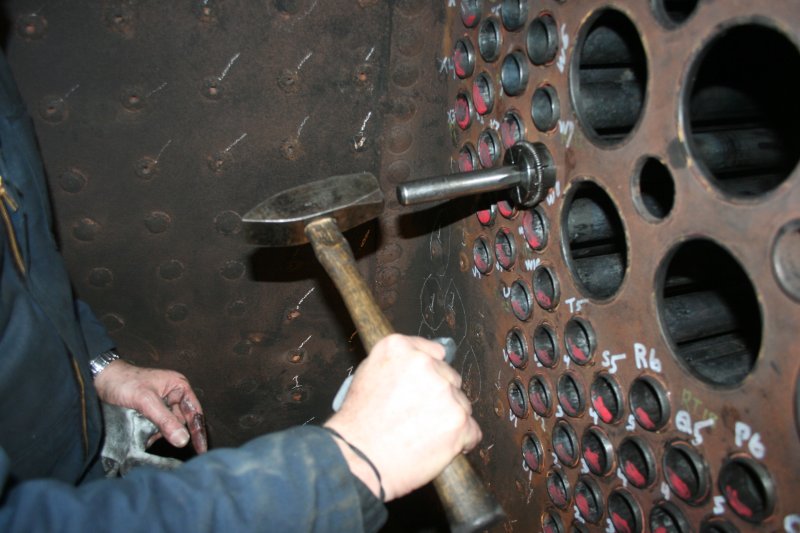
This tube is now clamped into place to, hopefully !, prevent it shifting as the rear end is expanded. This clamping should hold the tube against a certain amount of forward pressure as the tube expands against the ferrule. However, the feet noted above are critical in ensuring that the force of the air hammer itself is not applied to the tube. Were that to happen, this clamp would be thrown off at the first impact !.
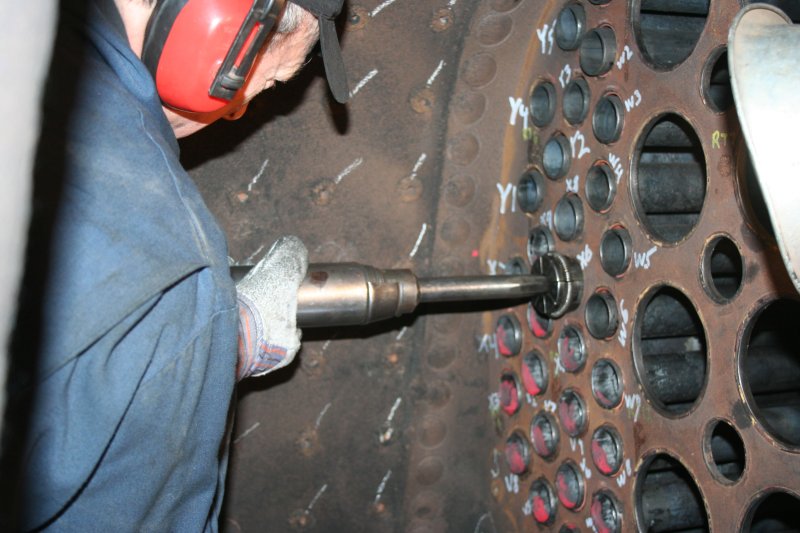
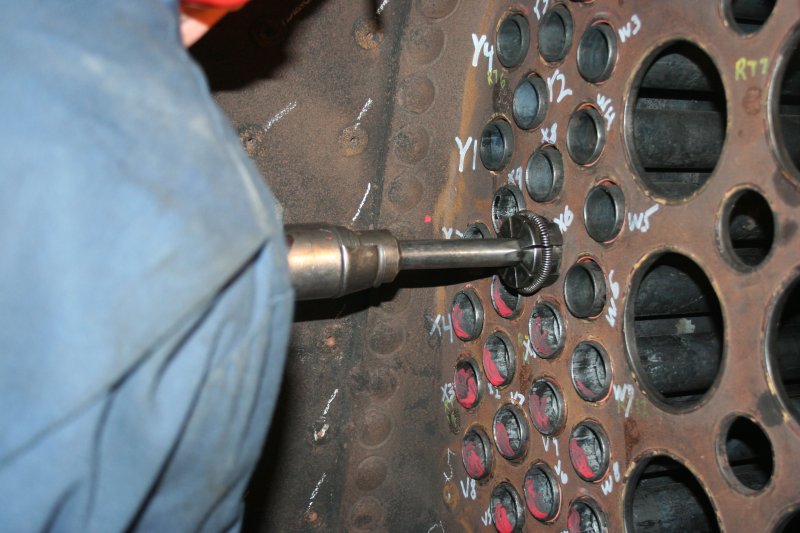
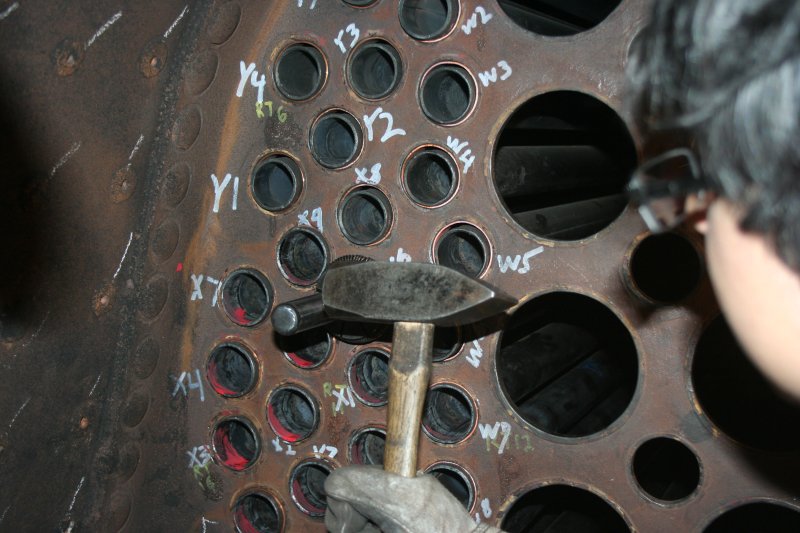
The expander is then inserted in the firebox end after confirming, by shining a flashlight down the tube from the smokebox end, that we are working with the same tube at each end. Important as it is a real bad idea to hammer a tube that is not the one secured at the smokebox end.
The pin is then hand hammered to expand the segments sufficiently to lock the expander into the tube end.
The air hammer is then applied
... and power applied until the pin is fully driven home. You can see by comparing this to the previous view that the travel and therefore the expansion of the segments, is quite substantial.
Then the pin is hand hammered at the end to loosen it. Regular application of lard to the pin is important to ensure that it releases. It is a finely balanced process. Substantial force is required to release the pin, which is initially locked into place by the force of a substantial; air hammer. It can often take many substantial blows to initially free the pin but, when it does free, the slope of the lubricated faces of the pin tend to drive it out. So it is real important to listen for the change in sound as the hammer it the pin. There is a real change in tone as the pins starts to free and if you do not notice this and keep hammering the pin can easily shoot out. Then you have the fun of groveling in the bottom of the firebox to recover the tool and pin!. The tool is then turned in the tube, secured and air hammered twice more and you have another tube fully expanded into the rear tube sheet. On 428: · Jerry continued grinding old braze metal from the boxes to prepare the surfaces for Dennis to weld in the reinforcing plates; · Tom continued planing the wedges used to adjust the axle boxes in the frames. So a good day's progress with a small team. Nigel Comments
Display comments as
(Linear | Threaded)
Add Comment
|
Blog AdministrationCalendarQuicksearchComments about Illinois Central Gulf 2002, a Paducah SD20 Tue, 06-02-2026 19:38 Always a treat when a new diesel comes to IRM! Only wish we'd get more diesel department news from week to week, I always wonder what's going on in [...] about Indoor storage after Barn 15 completion Wed, 03-25-2026 18:21 Exciting to see a new barn going up! What's next, after the RAIL project is complete? about New Acquisation: What is CN 15444? Tue, 08-12-2025 12:56 No new news that I have heard of thus far. about Burlington Northern 9908 body work Tue, 08-12-2025 12:53 I'll also be doing another update on it soon. Keep en eye out for that. about Burlington Northern 9908 body work Tue, 08-12-2025 12:47 A little work was done to it for Diesel Days this year. You'll see photos floating around for the temporary short term job that was done to make it [...] about New Acquisation: What is CN 15444? Wed, 08-06-2025 13:01 Is steam car CN 15444 going to be coming to museum several times it was to be moved to muesum about New Acquisation: What is CN 15444? Sat, 07-19-2025 18:56 Yeah, sadly it's still there as of 7/19/2025 about Burlington Northern 9908 body work Thu, 06-12-2025 19:14 Its been 14 years guys, where is the unit? Like really? Did you guys misplace it? Or are repairs taking that long? At this point be might we will have [...] about Milwaukee Road 33C update 3/23/2020 Wed, 04-09-2025 17:40 Jamie Thanks for the update. She's gonna shine like every thing else you guys do! Smeds about Diesel Shop update 3/5/2025 Thu, 03-06-2025 16:28 Yes, there is a wye. Those two have been MU'ed on diesel days a year or two ago. ArchivesSyndicate This Blog |