Sunday, August 5. 2012
Steam Department Update 08-04-2012 Posted by Nigel Bennett
in Steam Department at
12:13
Comments (0) Steam Department Update 08-04-2012It was one of those days when casual observation could suggest that the steam department had done nothing !. However we made steady progress on some critical work although the visible effect does not look much. On 1630: · we have now agreed terms with the boiler welding specialist for the back tube sheet and super heater flue work. Hopefully that will be done shortly. It should only take 4 days once he is on site. · the pipe to replace the corroded runs along sides of the boiler has been located and ordered. This in itself gave some quite surprising results. The small diameter heavy gauge steel pipe used on a steam locomotive now has few uses and is made in small quantities. Price is therefore driven by batch sizes and availability rather than the weight so we have larger tube costing less than larger and seamless costing less than seamed in some cases. · Collin finished the inside of the front tube sheet, so internally we now only have the contract welding of the rear tube sheet to do. · Mike and Bob continued forming the test sheet for the firebox patch. The activity this week was focused on forming the shape to match the sloping front tube sheet while retaining an accurate match to the curve of the mud ring. · the major activity was the continuing battle with the smoke box bolts. These apparently insignificant 3/4 inch bolts occupied a number of us all day. Looking at the locomotive in service they are simply the bolts onto which the nuts, that you see in a circle around the edge of the smoke box front sheet, are threaded. Although they appear at first sight to be studs, they are actually "T" headed bolts, unthreaded in the length that passes thru the front ring, that are driven into the ring from the rear. The snag is that they cannot be a really tight fit on the front sheet so there is a hidden cavity behind the nut in which moisture and gases attack the bolt. In service the smoke box is under vacuum and any leakage causes loss of efficiency and rapid corrosion as air is sucked past heated metal. We want to ensure that, once we do this overhaul, we have reasonable confidence that 1630 will be good for the next 15 years so we are working on the basis that these bolts should be replaced where they are wasted to less than 5/8th inch. This means removing 11 bolts. It is clear that the bolts at the top and bottom, which are subject to greatest wear, have been replaced at some stage as most of the 11 are at the sides. The documented way of removing these bolts is to hammer them from the front, potentially having heated the ring to assist the process. The bolts on 1630 do not seem to have heard of this process !!. None have proved possible to hammer out anything like whole. They are so firmly in place that hammering expands the bolt in the hole and makes it impossible to remove. The technique evolved during the day is to grind off the head of the bolt (which we think may in some cases have been welded during repairs at some time), very carefully drill a hole centered on the bolt and enlarge it to allow an air hammer bit to be inserted. This allows the air hammer to be used with less expansion of the bolt. If this does not work you have to collapse the sides of the bolt into the hole, re drill and try again. We now have 5 out. They are very variable. The last and worst did not come out until we had done this multiple times and reduced the length for 2 1/4 inch to 3/4. The huge frustration is that, when they eventually come out, it is just a plain smooth plug with nothing to indicate why it would have been so difficult to move. Here you can see the bolts. The green paint marks indicate good. The red marks and gaps those that are to be or have been removed. Here we are working on the last one on the engineers side, which proved to be the worst so far. Late on we called in reinforcements and received full support from the IRM Board. Thank you Jim !!. Any way , 6 more on the fireman's side for next weekend, then we can think about putting in the new ones.
Elsewhere Phil removed the lugs from the back of one of the axle boxes for 428 so that it can be mounted on the Bullard turret lathe to machine the bearing face. The plan will be to fit brass bearing faces, similar to those fitted to 1630, rather than poured babbit faces previously used. I will not be at Union next Saturday as my son is getting married. I do hope to be there Sunday so hopefully I will be able to report on a lot that the team has been able to get done without me getting in the way!. Nigel Sunday, August 5. 2012
CGW X 38 Update - August 5, 2012 Posted by Robert Kutella
in Chicago Great Western X 38 Russell Snow Plow at
05:21
Comments (0) CGW X 38 Update - August 5, 2012I am pretty much behind in offering more photos and history of our Chicago Great Western Russell plow. But here are some great images from the Joe Pierson Collection for your enjoyment. They provide interesting details and clues needed in our restoration work, even though right now the intent is not to repaint this into the yellow scheme. THE YELLOW YEARS May 16, 1982, Butler Yard, Milwaukee, WI May 16, 1982, Butler Yard, Milwaukee, WI 1984, no location We continue to make good restoration progress, but as with all such work at IRM, donations are appreciated, yes, even required to maintain the pace of the work. We have assembled an energetic team of volunteers, the money is what is missing. Please send your help to fund RX38 .
Thursday, August 2. 2012
Michigan Electric 28 Update - August ... Posted by Ray Schmid
in Michigan Electric 28 at
12:30
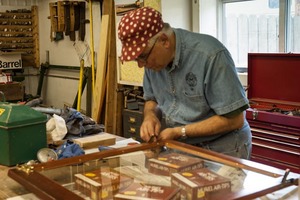
Comments (2) Michigan Electric 28 Update - August 2, 2012Roof Slat Installation and Side Window Replacement Continues! Jeff Brady is shown below belt sanding the first layer of rear roof mounted wood slats. In the blazing heat this summer, he is nailing the second and final layer over the first. The front and rear will both have two layers of slats that create the contour of the roof. The center carlines of the roof were covered with formed Masonite hard board that has now been painted with a flat black primer. Holes were recently cut by Walt Staffa (not pictured) for the roof vents that will be added following the installation of the canvas roof covering. Shown below is Doug Johnson removing the vent louvers inside the car before Walt cut the holes in the Masonite roof. Norm Krentel continues to disassemble the window sash openings to repair or replace the numerous pieces of wood stops or guides, and metal post caps while the sashes are out for restoration. Upon their return, the sashes are fitted with latches or lifts that will allow the passengers to operate the windows. Several window openings have been completed with the restored windows.
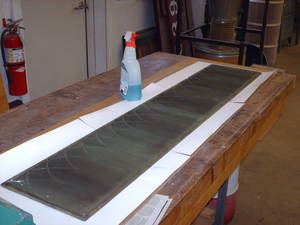
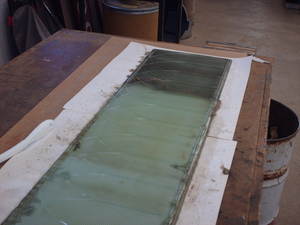
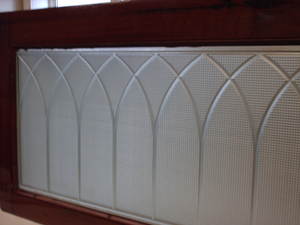
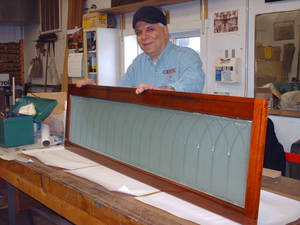
Ray Schmid is shown below installing the latches and lifts to the restored lower sashes. Also shown is Ray’s process for cleaning each pane of ornate upper sash glass before he sets them into the restored frames. There are interior and exterior upper sashes that span a set of two lower sashes. Ray has installed several cleaned panes into the waiting frames. Several of the pressed glass upper sashes have been installed on the car this summer. The press glass exterior upper sashes were painted white while the car was used as a cabin in Michigan and did not allow light to pass into the interior of the car. After paint removal and cleaning, the newly installed sashes make a huge difference in the appearance of the car. The before and after result is amazing! See for yourself in the above pictures in front of Norm.
|
Blog AdministrationCategory TreeCalendarQuicksearchSyndicate This Blog |
Powered by s9y.
Comments
Mon, 09-08-2025 08:22
Good job on the Burlington Nortern 9976. OK.
Tue, 08-12-2025 12:56
No new news that I have heard of thus far.
Tue, 08-12-2025 12:53
I'll also be doing another update on it soon. Keep en eye out for that.
Tue, 08-12-2025 12:47
A little work was done to it for Diesel Days this year. You'll see photos floating around for the temporary short term job that was done to make it [...]
Wed, 08-06-2025 13:01
Is steam car CN 15444 going to be coming to museum several times it was to be moved to muesum
Sat, 07-19-2025 18:56
Yeah, sadly it's still there as of 7/19/2025
Thu, 06-12-2025 19:14
Its been 14 years guys, where is the unit? Like really? Did you guys misplace it? Or are repairs taking that long? At this point be might we will have [...]
Wed, 04-09-2025 17:40
Jamie Thanks for the update. She's gonna shine like every thing else you guys do! Smeds
Thu, 03-06-2025 16:28
Yes, there is a wye. Those two have been MU'ed on diesel days a year or two ago.
Wed, 03-05-2025 14:04
7009 number boards look good. Is there a way to turn a locomotive around at IRM? In case you ever had a mind to connect 7009 and 6847?
Fri, 03-29-2024 21:26
We're slackers and spend more time working on the equipment in the shop than keeping all you readers updated. We'll work on it, but I'm sure updates [...]
Thu, 03-14-2024 08:02
What happened to the Department Blog? It's been over 2 years and I still regularly check for updates, but nothing comes...