Sunday, March 1. 2015Steam Department Update February 2015
Unfortunately not the update that I was hoping to be able to write 24 hours ago!.
The steam team has worked steadily thru a record cold February and made good progress, primarily on the Winter work on 1630. The work on the boiler was completed and the objective is to carry out an initial hydro test as soon as possible to ensure that nothing leaks on the backhead where it would be hidden by the refitting of the stoker and footplate. We really need some above freezing temperatures to safely run the heater that brings the water up to a suitable temperature for the pressure test. This has held us up for a week or so but the forecast suggests a “warm” day Tuesday so everything was planned. The tender was filled last weekend to allow the water to reach at least shop temperature. On Saturday the pipework was set up and a start made on filling the boiler.
Unfortunately this revealed that one stay seems to have broken during the process of clearing the tell-tale hole. A steady stream of water was apparent as we filled the boiler. With this stay plugged, we were able to fill the boiler and prove that this is the only stay in this condition. However, we now have a stay to replace. This was something that was not in the plan.
By end of day, Dennis had cut out the cab floor under the engineer’s area, the end of the stay in the firebox was ground flush and the stay cap had been removed. This proved rather reluctant and took a couple of attempts, otherwise we might have got the stay out. Anyway, we are now ready to remove it next week.
Replacing a flexible stay is something we did several times during the overhaul and can be done in a couple of weeks, provided we do not hit anything abnormal. However, it is additional work and means that the target of running Memorial weekend is now in some danger.
In parallel with the boiler work a lot of other work has progressed.
Dennis has put in many hours of work building up the yolk and other parts of the tender draw gear support mechanism. We should be receiving a rebuilt draw gear unit shortly and then the work can begin on making any modifications required to fit this under the tender.
A new pin has been machined for the front coupler pocket. The original was heavily worn. Once new bushes are machined and the support plate, that Dennis has rebuilt, is in place we should have a coupler that sits horizontal rather than sagging as it has in recent years!.
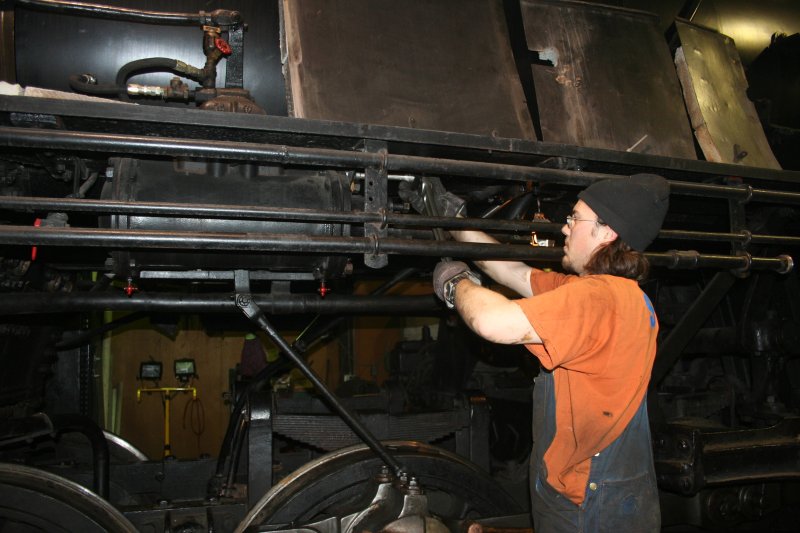
The air tanks are now refitted. This has been a big job as we have fitted new Teflon seals to the ball joints of the tanks. It sounds simple but replacing the very worn seals that have been there for many years can slightly alter the fit of the pipes. There is very little flexibility in large diameter steel pipes!. So in some cases we have had to cut and rethread the pipes to make the correct fit.
The new bush for the connecting rod is now complete and in place in the rod.
Dennis built up the brass on the securing disk. (My mistake. I said last month that the odd one came from a Mikado. Actually it is from a consolidation). Once that is machined we will have all the parts to reassemble the running gear.
However, the first steps at refitting suggest that, with the new bearing in place, clearance will be very tight and it may be necessary to remove and adjust the axle box shoes. Measurements that Jason has made indicate that the shoes are marginally thick and will need to be adjusted at some point. It may be that point is now!.
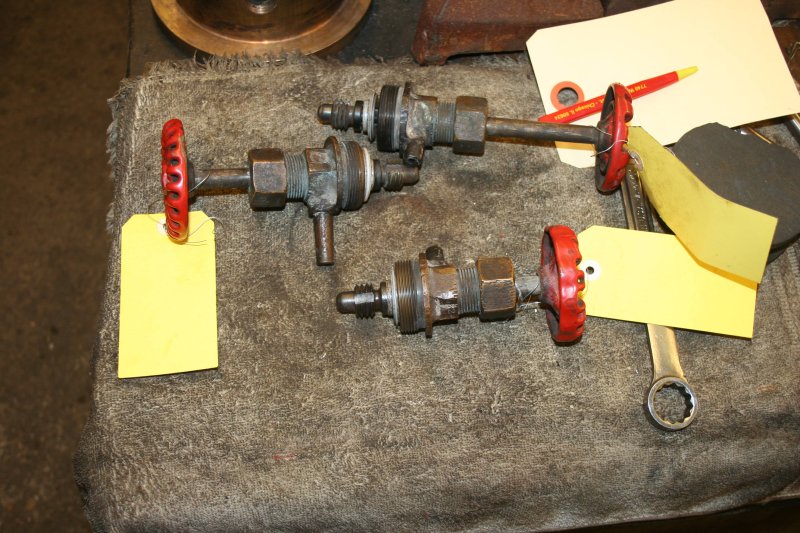
Work has been proceeding on the replacement of the gland packing on the air operated power reverser mechanism.
After a lot of effort the broken bolt in the smokebox front ring was successfully removed and a new one is in process of being fitted. John Heid joined us and was rapidly at work on this.
When the work on 1630 has relied more on welding and machining, people have been able to do some work in other areas.
Progress has accelerated on the Shay.
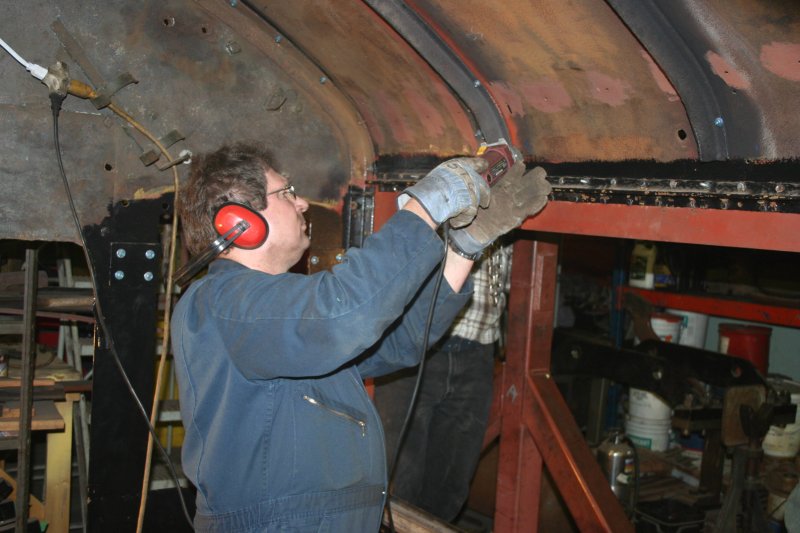
The big determinant of how quickly the Shay can be brought into service is whether we can clear the tell-tale holes on all stays behind the frames and motor brackets from inside the firebox. If all the tell-tales can be cleared to the required depth, we then need just to replace a number of stays in other areas that have been identified as bad and can then move quickly to re-tubing the boiler. If any stays need to be replaced behind the motor bracket, then we have a substantial project to remove and refit the motor in order to replace them.
Several people have been working on this as time permits but Phil is now working on the stays 3 days each week and making good progress. A lot of stays have been cleared so far. We all wait with bated breath to see if any prove beyond clearance in the critical areas. We should know within weeks now if we can avoid removing the motor.
Various work has been progressed to allow reassembly to move forward if the stay work is successful.
JD has been locating and preparing the various parts of the running boards.
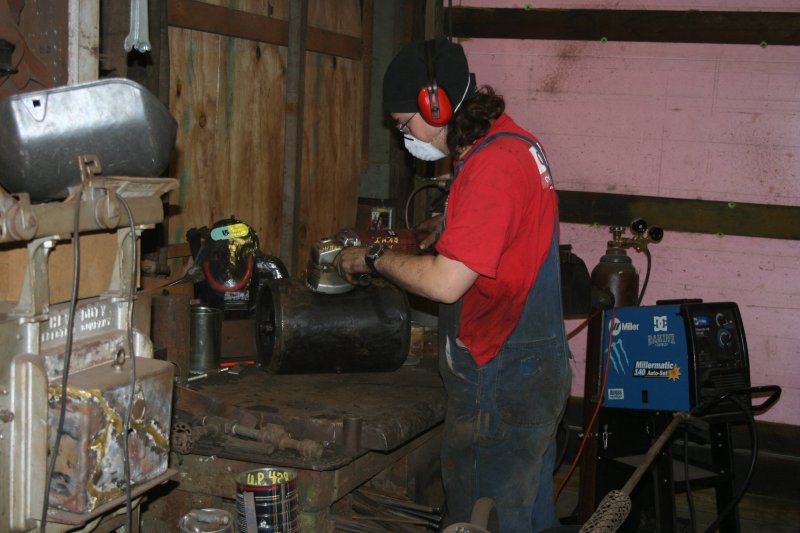
Brian removed the equalizer air tank and cleaned it in preparation for hammer and hydro testing.
(Brian’s comment on this photograph was very fair!. “You could at least have taken a before shot to show just how much muck I had to remove”). Located under the cab floor, behind the engineer’s footstep this tank gets buried is everything thrown up by the wheels. Good job Brian!.
On 428
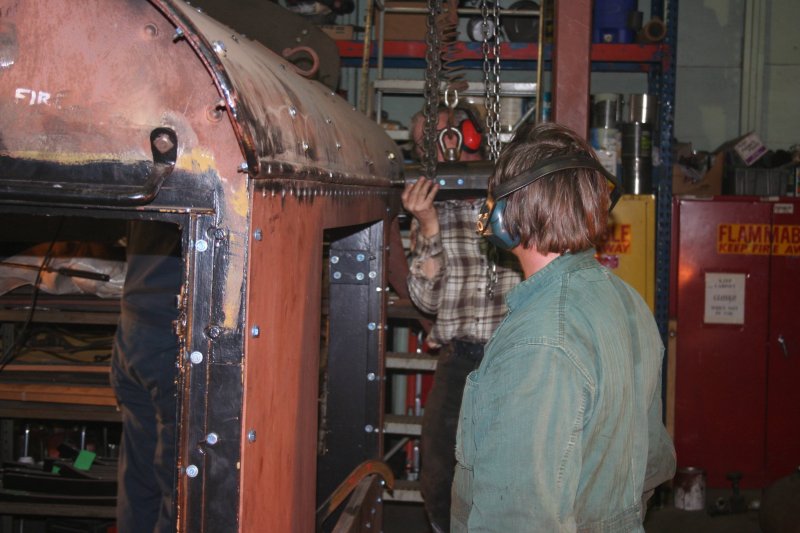
The riveting team, led by Stu, has put in several days on the cab. There are a LARGE number of small rivets to be placed but they are progressing and the number of temporary bolts showing on the cab is steadily reducing.
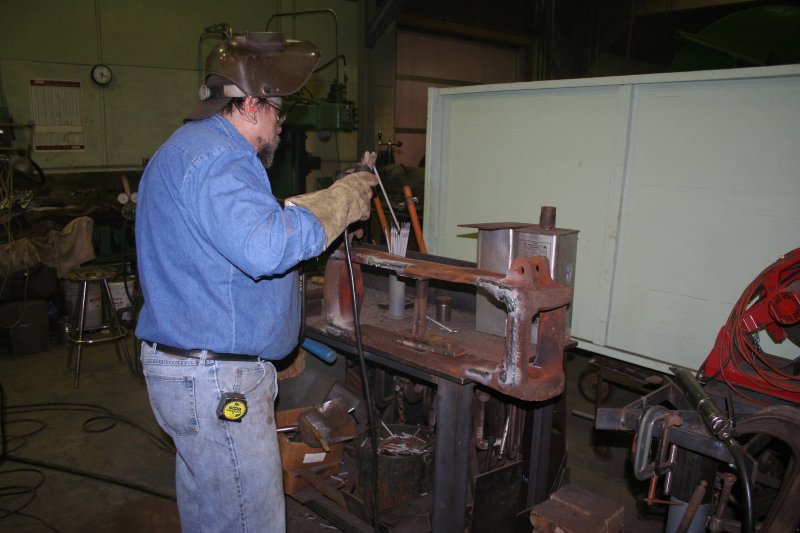
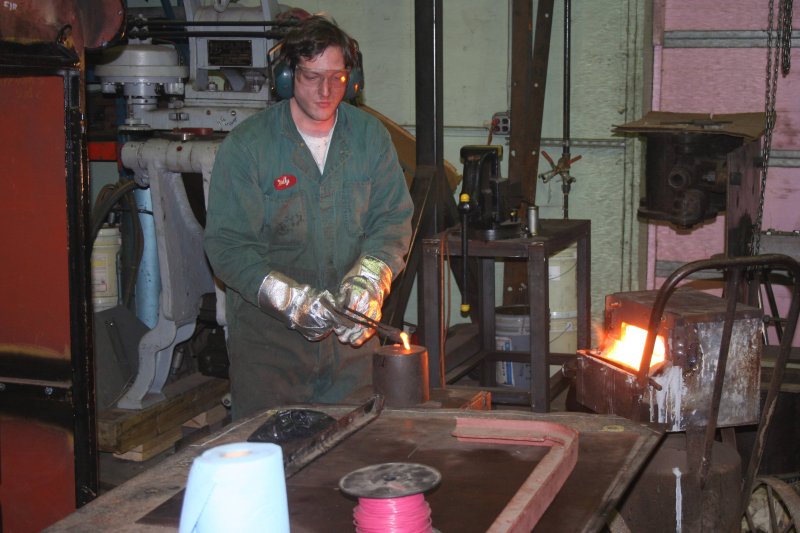
Once it is at temperature the rivet is struck on the anvil to dislodge any scale and then put into the hole.
The bucker holds the head of the rivet in position as Stu uses the air hammer to form the other end of the rivet inside the cab.
Although the basic method is the same, these are far smaller rivets than we had to use on 1630. Rather than fighting to ensure that the rivet is formed while still malleable, the risk with these is more that they can easily be over hammered and have unsightly deformed heads.
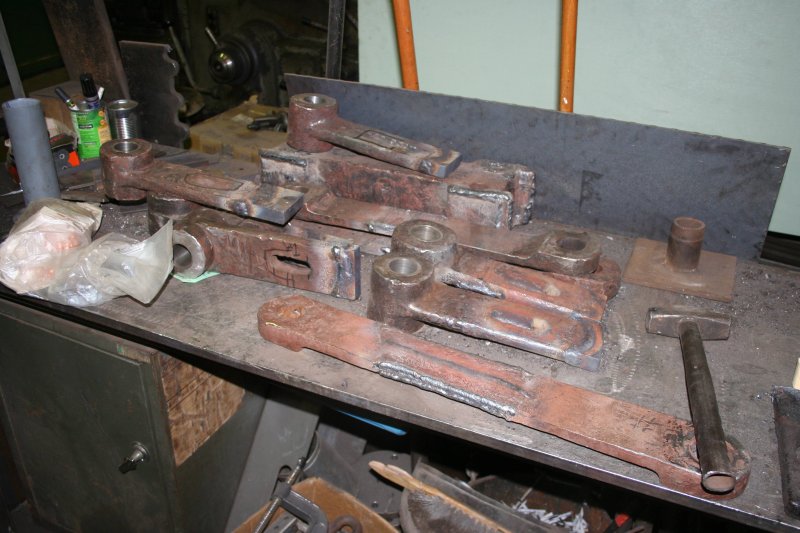
The process of Dennis building up with weld and Eric then machining to final dimensions has proceeded steadily thru the many components of the spring rigging. With this now largely complete, work has now started on machining the valve rods.
Mike returned this week after being out of state for some weeks and work restarted on the planer in preparation for the axle box work.
So March looks to be a busy and critical month. Wish us luck!. And if you fancy getting your hands dirty ………!!
Nigel
Sunday, February 1. 2015Steam Department Update January 2015
There is nothing like hunkering down for a big Winter storm to create time to update the blog!. There was a very good turnout at the steam shop yesterday (and I suspect a nil turnout today judging by the white out that can be seen on the webcams!!). As we reach the end of January a lot has been done in the steam shop so far this Winter ….. and there remains a lot to be done before May!.
Obviously the absolute priority is #1630 and getting her ready for the new season. While she was out of service the critical focus was on rebuilding the axle boxes on the trailing axle and the 15 year boiler inspection. Known or suspected issues were addressed during this time but we did not do a complete “tear-down” of areas that were within tolerances and had given no indication of problems.
So, for some years to come our Winter program will include the annual maintenance items and a program of inspection and remediation where required of some other areas each year.
The annual inspection work has progressed steadily. This is essentially in four stages:
The large majority of the inspection work is now done. Among other task:
We now have to test the gauges and finish checking of the arch tubes and we will be ready to carry out the hydrostatic test when the weather permits.
The other areas where major work is taking place this Winter include:
In the normal way when dealing with and elderly steam locomotive none of these has proved as simple as initially hoped!.
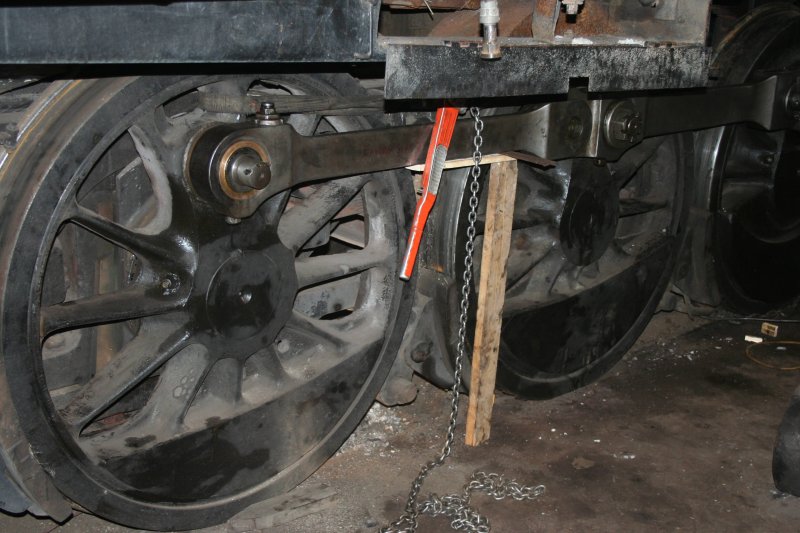
The rods between #4 and #5 axles have been removed and the dimensions carefully checked. The clear issue is excess wear in the FS #5 rod bearing. Material has been obtained and a new brass bearing will be machined and fitted to the rod. The other peculiarity is the disk that sits behind the securing nut and forms the outer face of the ES #5 rod bearing. The peculiarity is that it differs from the other similar disks and bears the number of a long gone Frisco mikado!. It is suspected that the difference can lead to steel on steel contact where the original pattern would always bear brass on brass. It may be that this was why this bearing was always the one that had a tendency to run warm. Dennis can add brass that will then be machined to match the original #1630 parts.
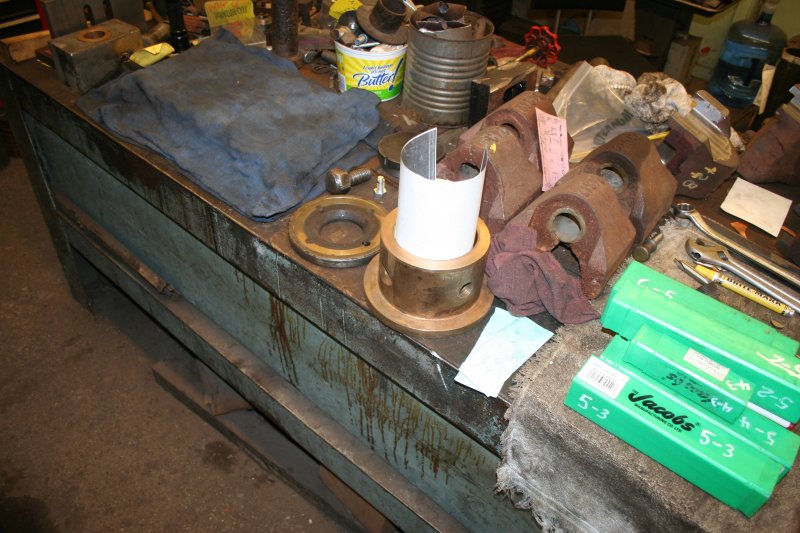
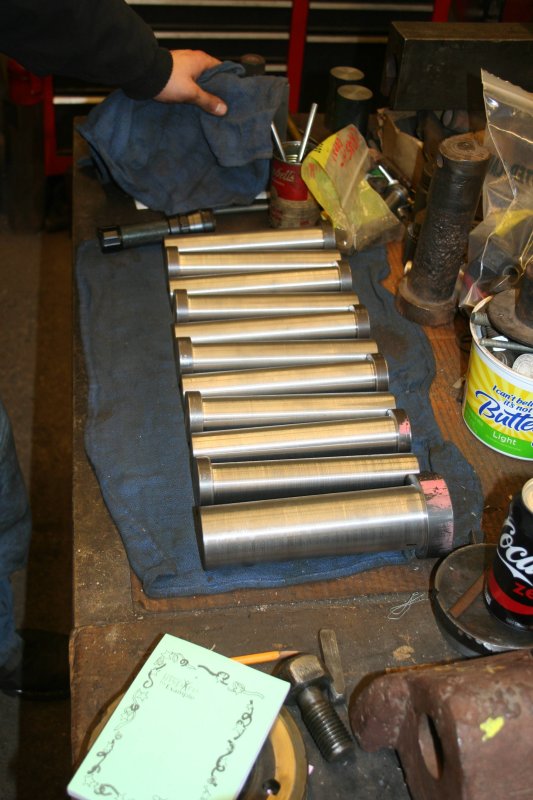
This shows the stock ready for machining the new rod bearing and, on the bench behind this, the disk that will be built up then machined to better match the original #1630 pattern.
An intensive inspection of the couplers has indicated no cracking of any of the large parts but some damaged internal parts that go a long way to explaining tricky operation. The good thing is that these are standard couplers so spares should not be an issue. The trouble is that removing the couplers has led to detection of more work needed on the draw gear.
Under the tender significant wear was found in the mechanism that provides “shock absorption” when backing onto or pushing a train. While not an immediate concern with the weight of trains handled at IRM, it was decided to give this area a thorough overhaul.
The following pictures show the work involved in detail
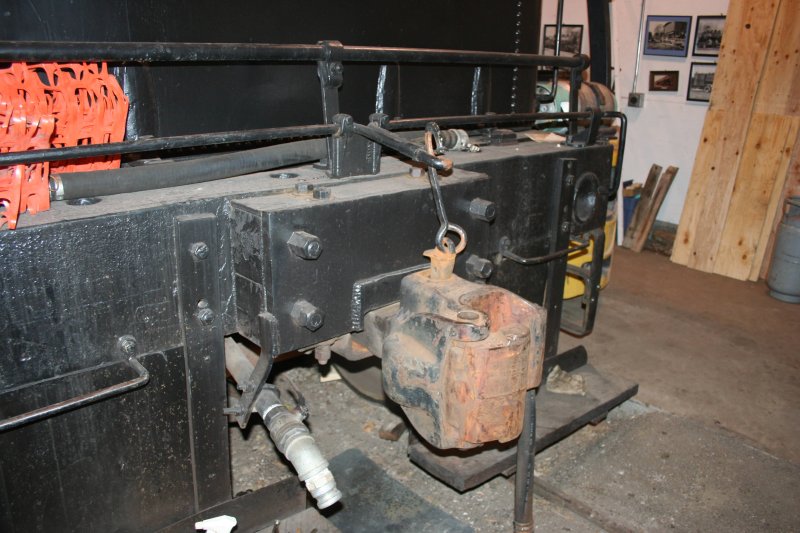
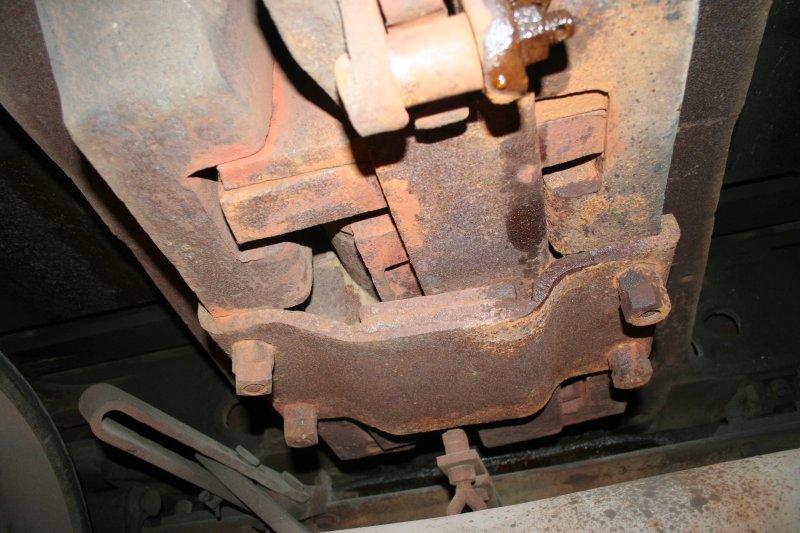
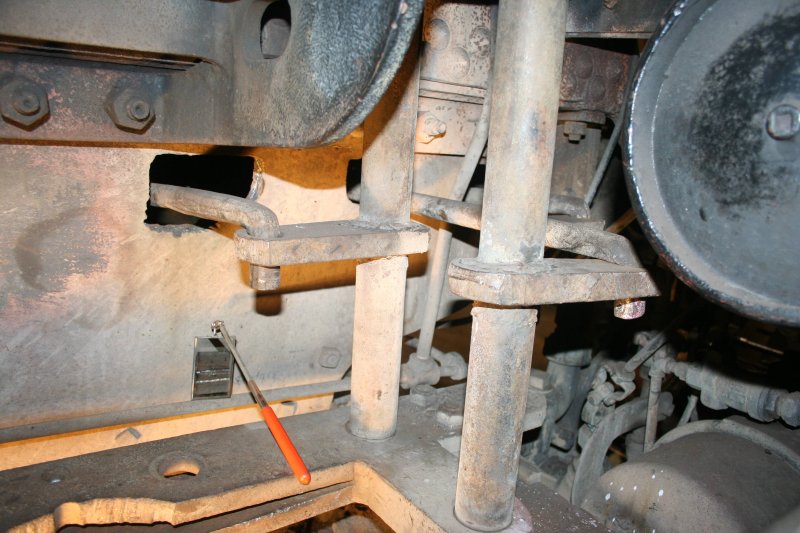
This is what you are used to seeing
Behind this, under the tender, the coupler is backed by this assembly. The coupler is attached to the cage assembly by a substantial pin that is inserted or removed from below and held in place by the bolt that can be seen at center in this picture.
Looking further back (actually toward the front of the tender) you can see the cage and, substantially hidden above it, the outer edges of the shock absorber.
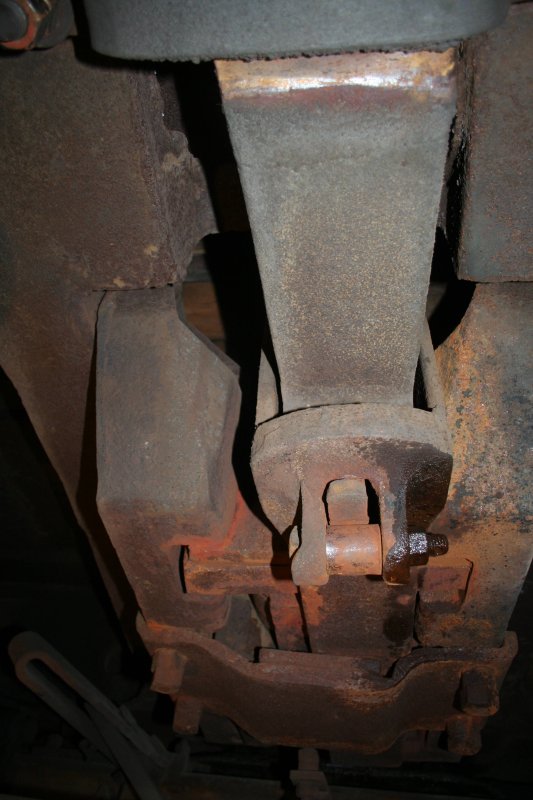
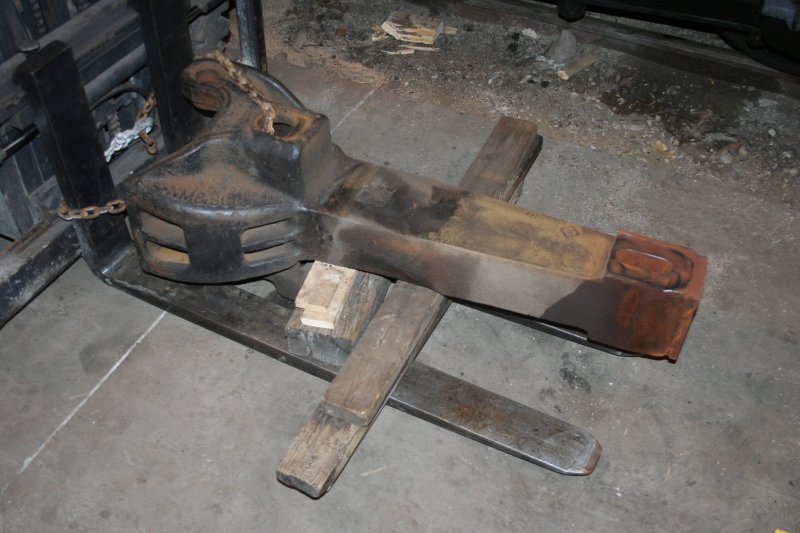
First the bolt is removed, the pin dropped and this allows the coupler to be removed. Here you can see the hole thru which the pin fits to secure the coupler to the drawgear. The pin is actually a substantial rectangular block with rounded ends.
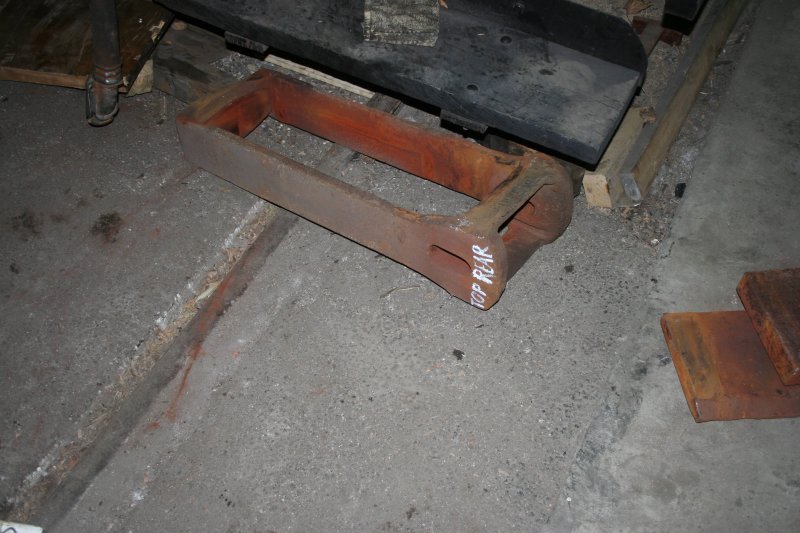
Having removed and separated the cage and shock absorber the empty cage clearly shows how the pin secures this to the coupler.
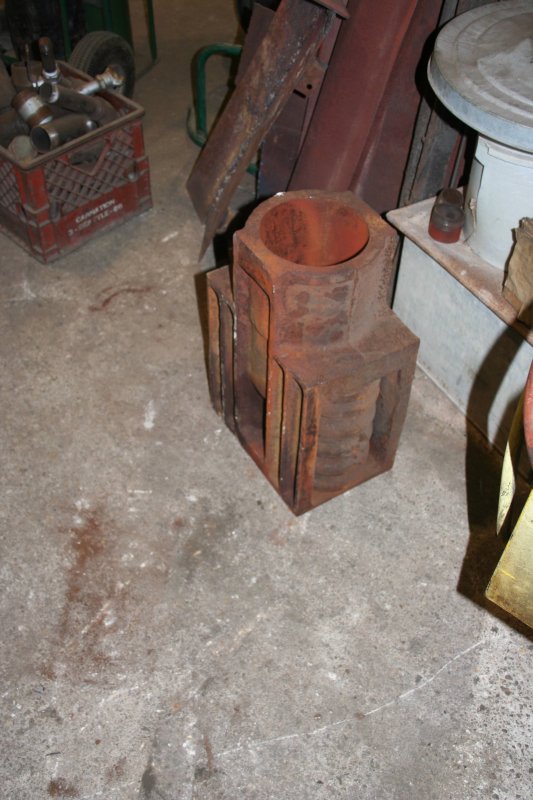
And here we have the “problem child”. The heavy frame of the shock absorber still has the massive springs in the wider part of the casting. Information suggests that these huge springs are compressed about an inch when fitted and you do not touch these without special equipment!. The empty end of the casting is the location of the smaller springs that were removed in many pieces.
Dennis will build up the mountings under the tender where there is significant wear. Meanwhile there is a lot of discussion on how to deal with the shock absorber. The original unit has two groups of springs, one fairly substantial and one VERY large. The clear intent seems to be that the smaller ones provide an initial softening of the impact while the big ones take the load after these are compressed. In our case, the smaller springs were smashed to pieces and clearly had been for a long time. Two avenues are being investigated for repairs. A source has been identified that could produce replacement for the broken springs while the original manufacturer is still in business and does produce modern equivalent units that are still used in freight cars (as those fitted to #1630 were in 1920). Initial feedback from the spring supplier is interesting, suggesting that the (1918) design is defective as the smaller springs would have a very short life and be likely to fracture pretty quickly in exactly the way that had happened on #1630!. We have no idea if the design was changed but it does suggest that, if a modern equivalent can be installed without major modification to the tender, this would be the best solution.
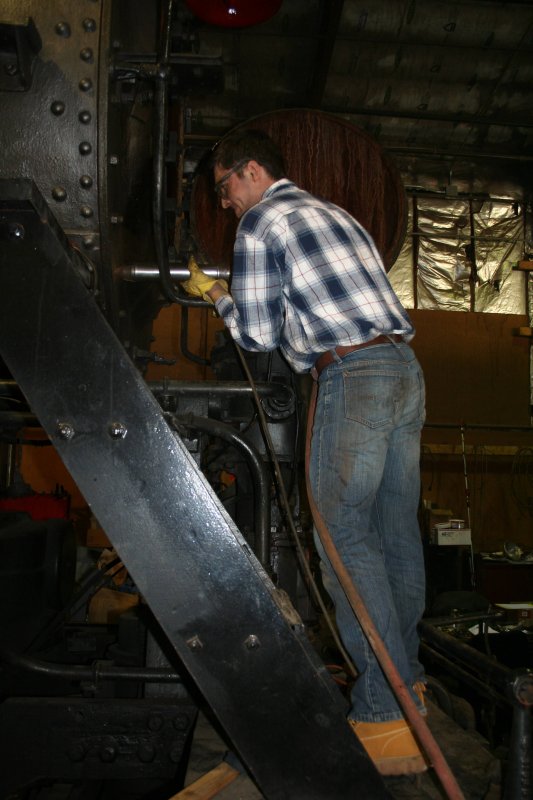
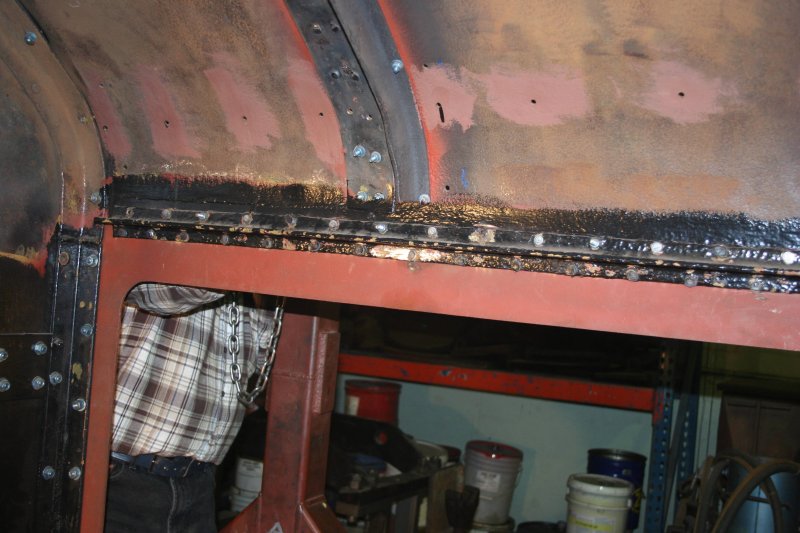
The flexible stays hidden under the footplate behind the stoker riser have all been inspected cleaned and recapped. A good deal of rust damage was found in the footplate supports. It is interesting that much of the corrosion stems from modifications made to fit the stoker, probably in the late 1930’s. The center of the cab floor has to be raised to provide space for the coal delivery to the stoker. To provide a level floor to the cab raised sections were installed on both sides of the cab sitting on top of the original floor to provide a surface about 3 inches higher. This created a double skin in which a lot of corrosion has occurred. Much of this has been repaired and the remaining action will be to rebuild the center section around the stoker delivery pipes. This places a lot of pressure on getting the hydro done as soon as possible. We do not want to re-install the stoker delivery pipes until we are satisfied that the flexi caps have passed hydro testing. But we have a lot of work on rebuilding the cab floor that requires these pipes to be back in place!.
After a great deal of work this weekend the area under the ES footplate is clean and partly reassembled. Here you can see the fabrication that sits below the grate shakers and converts the rotation of the shafts in the cab floor to a back and fore movement of rods attached to the grates.
The air filter site behind the compressor under the smokebox and on top of the main frame. It is basically a large cartridge filter where you release a bolt securing the housing, drop the housing and cartridge, then re-install with a new or cleaned cartridge. Simple!, except that it was mounted so that the housing has insufficient space above the main frame to allow it to be dropped. We know that 2 years ago we did manage to get it off but this year a large number of us in 4 hours work could not find a way of doing so. Eventually we decided to cut the bar on which it is mounted and modify it to have bolts that can be released to remove the whole filter. Interesting. When cutting the bar it was apparent that we were following the line of a previous cut and weld. So it seems that this is not a new problem!.
The stoker motor is now in the shop awaiting attention when essential work for this season has been done. Last weekend a few of us opened the cylinders, applied lots of oil and then tried turning it with substantial bars. Actually, while it took a good deal of effort to get initial movement, once it started to move and oil spread on the bores and rings, it now moves very smoothly and easily.
As time permits some work continues on the other projects.
On the Shay,
On #428
So. A lot of progress has been made but there remains a lot to be done to ensure that #1630 is ready for running in May. We will be hard at work each weekend and some weekdays. We are always looking for new people willing to get their hands dirty!.
Let’s hope we do not get many storms like the one today. I suspect that it will be a couple of days before it is practical to get back to Union!. Nigel
Friday, January 30. 2015A few Smokey Hollow shop pictures
As the winter continues with it's first big snowstorm looming the shop forces are again working on the museum's favorite steamer, the 1630. Here are just a few of the many maintenance projects begun on the engine.
 Nigel, Jerry, Christian, and Derick are again installing the air tank on the enginemans side of the loco.  Here Nigel and Jason are removing part of the cab floor. Notice the large openings in the location of the firebox door. December and part of January were devoted to the removal and inspection of the stoker motor and its components.  You can not see them but there is a line of rivets installed  Notice all the piping that is required to bring the 428 back to steaming condition. |
Blog AdministrationCalendar
QuicksearchArchivesSyndicate This Blog |
||||||||||||||||||||||||||||||||||||||||||||||||||||||||


Comments
Wed, 04-01-2026 09:01
Good job on the barn 15
Wed, 03-25-2026 18:21
Exciting to see a new barn going up! What's next, after the RAIL project is complete?
Mon, 09-08-2025 08:22
Good job on the Burlington Nortern 9976. OK.
Tue, 08-12-2025 12:56
No new news that I have heard of thus far.
Tue, 08-12-2025 12:53
I'll also be doing another update on it soon. Keep en eye out for that.
Tue, 08-12-2025 12:47
A little work was done to it for Diesel Days this year. You'll see photos floating around for the temporary short term job that was done to make it [...]
Wed, 08-06-2025 13:01
Is steam car CN 15444 going to be coming to museum several times it was to be moved to muesum
Sat, 07-19-2025 18:56
Yeah, sadly it's still there as of 7/19/2025
Thu, 06-12-2025 19:14
Its been 14 years guys, where is the unit? Like really? Did you guys misplace it? Or are repairs taking that long? At this point be might we will have [...]
Wed, 04-09-2025 17:40
Jamie Thanks for the update. She's gonna shine like every thing else you guys do! Smeds
Thu, 03-06-2025 16:28
Yes, there is a wye. Those two have been MU'ed on diesel days a year or two ago.
Wed, 03-05-2025 14:04
7009 number boards look good. Is there a way to turn a locomotive around at IRM? In case you ever had a mind to connect 7009 and 6847?